In any genre, the snare drum is almost always one of the most dominant sounds in the mix. Changing the snare drum sound can change the entire feel of a song, whether it be rock, country, pop, metal, etc. I’m going to go through some techniques that I use to make the snare sound great.
Snare drum and Tuning
While this might seem a bit obvious, choosing the right snare drum (or sample), and making sure that it’s tuned properly for the sound you are trying to achieve is absolutely key. If you don’t have a good source, then you are making it really hard for yourself. There are so many options, and it’s not always easy to know what type of snare to use, and how to tune it. If the budget of your session allows, it’s always a good idea to bring in a professional drum tech to ensure that you have the right snare drum with the proper head and that it is tuned well. A good drum tech will be able to help you achieve the right sound regardless if you are looking for a low, fat sound, or a tight and crispy sound, or anything in between. Usually, they will have some of their own snare drums to bring in as well.
If a drum tech is out of the budget for the session, it’s a good idea to learn how to tune drums yourself, and at least have a good knowledge of the basics. There are a lot of good YouTube videos out there to help, and practicing tuning is very important. The more you do, the better you will get at it, just like playing an instrument or mixing music. Know the different types of drum heads out there and what they do to the sound. This is very important as a drum head can drastically effect tone. Having more than one snare drum at a session is definitely a good idea as well, even if you have to rent, in case one doesn’t pan out. It’s hard to know what a drum will sound like when its mic’d up until you actually do it. Sometimes it’s not always the most expensive and “best” snares that end up sounding right for what you’re looking for.
Mic Technique
Micing a snare can sometimes be tricky, as the placement can depend upon the setup of the player. Mic placement is extremely important when capturing drum sound, so it’s important to make sure the player understands that they may have to alter their setup slightly to accommodate a mic placement.
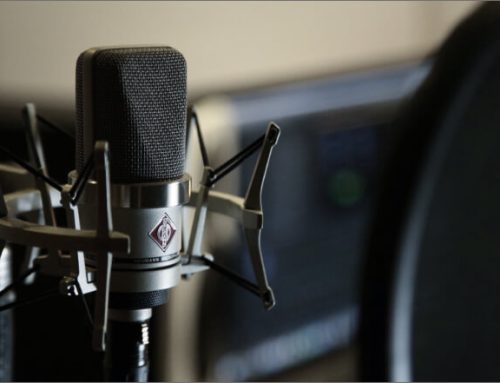
While there are a plethora of great mic’s that are available to use, a tried and trusted (and cheap!) mic is the Shure SM57. I have used this mic a ton in drum sessions, always with great results… but again, mic placement is key. Personally, I like to point the mic angling downwards towards the center of the snare drum, at a distance of about three finger widths from the drum head. The farther away from the drum you place the mic, the less tone you pick up, particularly in the low mids. The farther towards the edge of the drum you point the mic, the thinner the tone can be, and this can depend on where the drummer hits the snare as well. A good drummer will consistently hit the snare right in the middle, maximizing main drum tone, and reducing overtones.
Placing a mic on the bottom of the snare drum can really add to the sound. You will want to be careful on the placement of this mic, as it depends on where you put the mic on the top of the snare drum. You want to match the distance of the top mic to the drum head, as this will ensure that you won’t have any phase issues. You may also need to reverse the phase of the bottom mic compared to the top, as it might be 180 degrees out of phase. When getting sounds, it’s a good idea to record a quick snare hit just to have a look at the waveforms between the two mics, and make sure they’re lining up.
Compression
Compression can be a powerful tool when shaping any drum tone. It can be a little bit daunting to understand if you are unfamiliar with compression and the several different types, but there are good resources that can help you understand and choose the right compressor for what you want to achieve for your drum sounds.
When I compress snare drums, I treat the top and bottom mic quite differently. On the top mic, I like to use a couple layers of compression. First I usually start with a compressor set anywhere from a 4:1 to a 10:1 ratio, depending on sound I am trying to achieve. In softer music, to preserve more dynamics in the playing, I would use a smaller ratio. In louder music such as rock or metal, I would tend to use a higher ratio. Attack and release settings are very important as well… waveforms created by drum attacks are fast, so a faster attack time on your compressor is a good way to go. You want to be careful not to set it too fast, however, as the compressor may take away all of the initial “smack” of the hits. Release settings can somewhat depend on song tempo, and time between hits. In a faster tempo song, a faster release time will ensure the compressor ducks out before the next hit, allowing the snare sound to breathe a little bit. In slower tempos, there’s more space between hits, and the release time can be set a bit longer, but it’s all about experimenting to see what you like. For threshold, I like to ensure that the compressor doesn’t go past about -12db of gain reduction… hitting the compressor harder than this can choke the sound of the drum. This is why after I dial in the first compressor, I add another compressor right after it in my chain that has similar settings to the first. The two-act together providing good “smack” without choking the sound too much, and still preserving some dynamic in the playing.
On the bottom snare mic, I will hit a single compressor quite hard… or two if it calls for it. I like to use a high ratio for this, usually 20:1, with a very fast attack time, and a medium release time. I set the threshold to achieve about -15db of gain reduction or more. This will really bring out life in the actual snares on the bottom head of the snare drum and add length and depth to the hits. It may sound odd when you do this and solo the mic, but when you mix it in with the kit, it sounds great.
EQ
Once again with EQ, I will treat the top and bottom mics differently. On the top mic, I like to use a high pass filter, usually set around 100hz to get rid of the unwanted low end that can muddy up a mix. Then, I will use a high shelf starting between 6-10k depending on the sound of the snare. I will usually also have a low-mid boost around 250hz to bring out some of the beefiness of the drum. You don’t want to overuse this is as it can make the mix muddy, but used carefully it can fatten up the sound.
On the bottom snare mic, I will use a high pass filter set around 200hz… usually, there is a bit of kick drum bleed into the bottom snare mic, especially with lots of compression. Using a high pass filter will take out some of the sound of the kick drum bleed in this mic. Then, I put on a fairly drastic high-end shelf set at about 10k that brings out a lot of the sizzle and crispness of the snares.
Room sound / Reverb
Room sound can drastically change the sound of drums, particularly the snare. Big, live rooms with tall ceilings can add a lot of space and length to drum sounds. Whereas smaller, treated rooms will lead to tighter sounds. Different sounding rooms may be better for different types of songs. For slower, more open songs, bigger rooms may sound better as the song has more space for long drum sound decay. At the end of the day it is all up to personal preference, and sometimes you may not have a choice depending on what choice of studios you have to record in.
If the room isn’t quite cutting it for the sound you are looking for, reverb is a great way to add a little bit more depth. There are tons of options for reverb, and again, each song might require something different depending on style and tempo. Regardless of the type, usually I will use a low pass filter at around 6k, and a low-mid boost around 250hz on the reverb for the snare. Again this just fattens up the sound a little bit, and the low pass filter prevents the highs from washing out… the crispy high-end attack stays tight, and right up front in the mix on the main snare track.
Hopefully, you find these tips useful! If you want to hear some examples of these techniques in a mix, head over to methodmusic.ca
Nathan Kidd – Mix Engineer and Music Producer
Production/mixing Inquiries: nathan@methodmusic.ca


