Tape Saturation
Ok so let’s start off with tape saturation. Tape Saturation is an effect that was originally created by recording “Hot” mixes onto tape to make a natural compression / limiting effect. When the tape is driven in the analog world it creates what is known as “soft clipping” a natural overloaded fuzz sound, Unlike clipping in the digital world where a waveform is totally destroyed when it peaks past 0db analog clipping retains the soundwave just adding harmonics to it. Nowadays because the tape is so expensive to use and most people mix “in the box” there are tons of plugins that emulate tape saturation free and paid my favorite is Ableton lives stock saturator plugin as it is easy to use and doesn’t use lots of CPU power. Saturation is often described as being too subtle and inaudible for most projects. While this is somewhat true I still believe if used correctly tape saturation can be a great tool when it comes to creating a great mix.
Let’s talk about using a tape saturator on drums. Drums that are recorded through expensive preamps in 24bit 48khz audio can sound amazing don’t get me wrong but in a rock or metal production, you need that “grit” and “edge” that will help them stand out from the distorted guitars. So adding some tape saturation to a drum bus whether it be from a plugin or real tape can be just what you need to make them stand out in the mix without destroying the waveform. Another great use for tape saturation is on synth sequences. Virtual analog synths can sound great on there own but with some saturation the can sound even closer to the real thing giving them that “edge” and “grit”. Also, vocals can surprisingly benefit from a good dose of tape saturation making them sound “fuller” and louder, quite often giving them a chorus like an effect.
I would also like to touch on tape saturation and mastering. A common practice for engineers is to apply some saturation to a master bus to give a mix an analog quality. This can fool even the most trained ears into thinking that hardware was used in the process.
So if you want to add “fuzz” or “grit” to an instrument, beef up some drums, make virtual soft synths sound more realistic or simply give your track a vintage analog feel then tape saturation is for you.
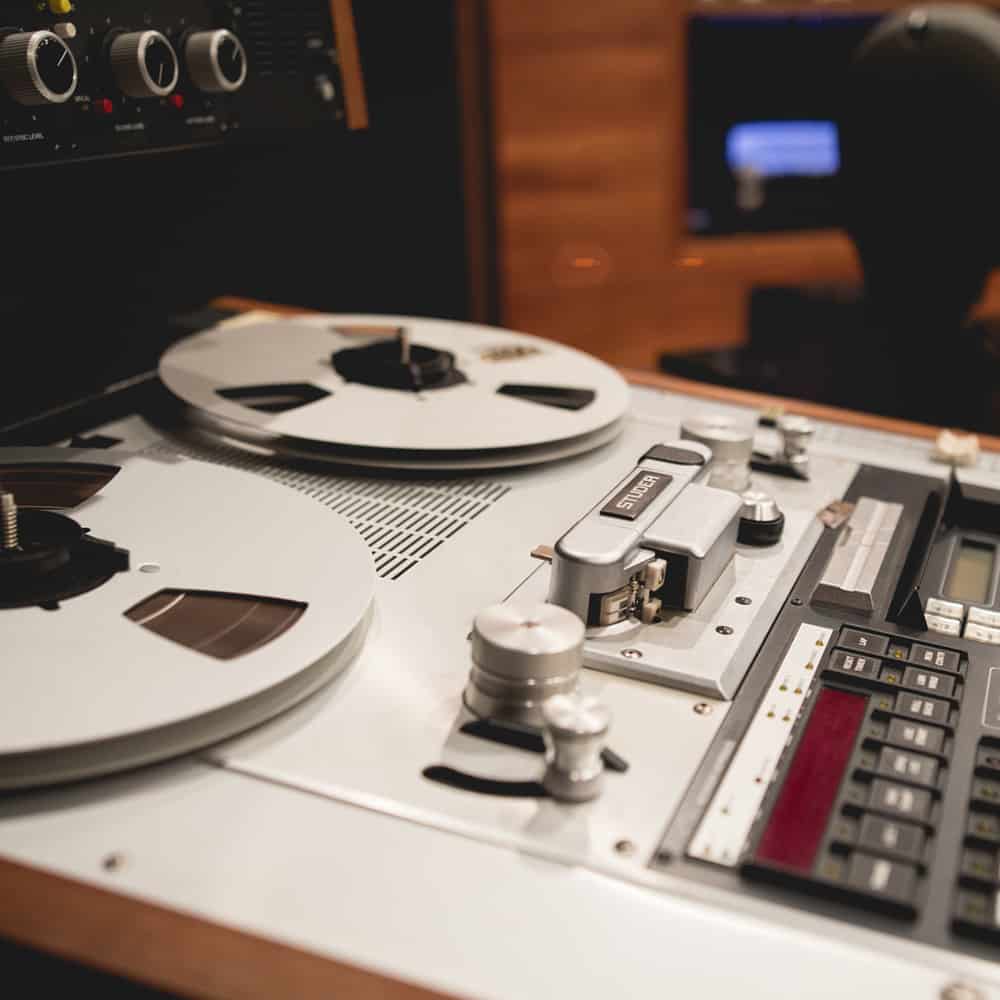
Analog Tape Machine in Le Lab Mastering Studio
Reverb
Now, let’s move onto reverb. In simple terms, reverb makes audio sound like it’s in a certain room or space. It is heavily used in post-production audio for movies and Television to add to the emersion and give the viewer a sense of space. When characters do adr there voice needs to sound as if it’s being spoken in that room so a suitable reverb is applied. Usually, a reverb bus is created and all the sounds from a particular room for example adr and Foley are sent to that bus making them sound like they are in that room. Without reverb movies and tv programmes would sound too dry and unnatural.
In music productions, reverb is a great way to fill out and add depth to a mix or instrument. Say for instance you have a track with very few elements in it adding reverb to a certain element can fill the mix out instead of adding more elements. Or if you want to give something more emphasis applying reverb to just that can help it stand out. I like to use it reverb in synthesis to create rich pad sounds and on white noise fx to make them fade out rather than stop abruptly.
Most plugins have presets to use with emulations of small rooms, cathedrals, stadiums etc. But if you want a specific sound you can dive in and tweak the individual settings yourself. The most important being “decay time’ and “dry/wet”. The decay time dictates how long it will take the sound pressure level to reach -60db the threshold of human hearing. The dry/wet setting adjusts how much processed and unprocessed signal comes into the mix. Other settings that are mostly used in post-production audio are “Early Reflections” and “Diffusion”. Early reflections are the parts of the original signal that we here before the reverb tail. Diffusion is the reflecting surfaces ability to spread the reverb out. For instance, a flat wall would be great for spreading a reverb out whereas a wall of rocks would diffuse the reverb bouncing it into thousands of directions.
So reverb has to be one of the most used plugins in digital audio workstations. Let’s face it makes everything sound great. But it can also be your worst enemy in terms of achieving clarity in your mix and making every instrument in the mix audible. I always use minimal reverb on my tracks not because I don’t like how it sounds but because it has a tendency to “bury” other instruments in the mix. Yes, it adds depth to your mix but it can easily make your mix muddy. So next time you are using reverb try bypassing it and asking yourself does it really sound better? Can I get away with adjusting the dry-wet? Can I use it on fewer elements?
Delay
Finally, I want to talk about delay. If I had to choose one effect I could use for the rest of my life then it would be delay simply because how versatile it is. Delay is the building blocks for other effects such as reverb, chorus, and flanging. Delay is when audio is repeated over a certain period of time giving a looping Effect.
It first became popular in reggae music which spawned it’s on sub-genre called dub reggae. Dub reggae came about when producers like king tubby and lee scratch Perry used the Roland space echo to create spaced out instrumental versions of reggae tracks. They would send the individual stems of a track from a mixing desk to the delay In real time effectively working the mixer just like a DJ did. Fast forward to the late 70s and early 80s and digital audio signal processing was becoming inexpensive. Companies like boss and Ibanez started developing digital delay pedals. These were heavily used with electric guitars and synthesizers. Artists like Jean Michel Jarre used delays on all of his tracks from his first album Oxygene. Making it sound like it came from outer space.
Nowadays with today’s Digital Audio Workstations, there are no excuses not to use delays. Most delays have presets but I think its better to use the controls to allow control over the time and feedback etc. 1-5 Millisecond delays will give you a flanging effect, 50ms or less will simulate double tracking, delays of over 100ms will give you the classic slapback delay used heavily in the 60s from artists like Elvis Presley and longer than this will put you into outer space territory. Time and tempo are usually also available to tweak so you can sync them with the tempo of your project. So when I say delays are very versatile I really mean they are very versatile.
As well as the bog standard delays as described above there are also effects like ping pong delays which give a stereo left and right hard panning effect hence the name ping pong. This can come handy when you have a very mono sound spreading the sound out within the stereo field. So when It comes to having an in-depth mix delay are a very quick way of achieving that. Often the best delays are the ones that offer other audio processing within them. Lfo modulation, Tempo modulation, and pan just to name a few. When all of these are combined you can quickly end up with spaced out wobbles and echoes.
Lastly, I want to talk about dub delays again. Here I will explain how they work. This is a delay that feeds back on itself creating an endless loop and when the feedback level is high enough the delay will increase In decibels. Be careful though because this will eventually exceed 0db and can blow your system very easily. When using this technique it’s always best to use a limiter just in case the worst happens. A common practice to emulate the Roland space echo dub delay effect is to put a saturator and reverb on the same bus experimenting with the settings. Once the delay drives the saturator you get that classic distorted effect.
My Final Thoughts
To conclude I think that to make your productions come alive a mixture of the above effects are a necessary step. Reverb will dampen sharp transients from an instrument and will give the listener the impression that a sound is coming from a certain room or space. Tape Saturation is great to give your mixes “Grit” analog feel and delays are great for creating flanging and echo effects.
Blair Fraser – Audio Engineer and Music Producer
www.blairfraseraudio.com
